Advantages
· Wide measuring range. It can measure the hardness of all metallic materials. Direct display of hardness scales HRB, HRC, HV, HB, HS, HL and three types of strength values immediately.
· Large 3 inch screen LCD, showing all functions and parameters. With EL background light.
· Seven impact devices are available for special application. Automatically identify the type of impact devices, and with the user calibration function.
· Test at any angle, even upside down.
· Large memory could store 500 groups (Relative to average times 32-1) information including single measured value, mean value, impact direction, impact times, material and hardness scale etc.
· Battery information showing the rest capacity of the battery and the charge status.
· Original imported high speed thermal printer support the immediate printing function. It can save data permanently.
· NI-MH rechargeable battery as the power source. Charge circuit integrated inside the instrument. Continuous working period of no less than 150 hours (EL off and no printing).
· Auto power off to save energy.
· Excellent after-sale service system for high quality products two years’ guarantee and all life maintenance. Easy to buy and comfortable to use.
Main Application
· Die cavity of molds
· Bearings and other parts
· Failure analysis of pressure vessel, steam generator and other equipment
· Heavy work piece
· The installed machinery and permanently assembled parts
· Testing surface of a small hollow space
· Material identification in the warehouse of metallic materials
· Rapid testing in large range and multi-measuring areas for large-scale work piece
Technical Specifications
· Error and repeatability of displayed value:
No | Type of impact device | Hardness value of Leeb standard hardness block | Error of displayed value | Repeatability |
1 | D | 760±30HLD 530±40HLD | ±6 HLD ±10 HLD | 6 HLD 10 HLD |
2 | DC | 760±30HLDC 530±40HLDC | ±6 HLDC ±10 HLDC | 6 HLD 10 HLD |
3 | DL | 878±30HLDL 736±40HLDL | ±12 HLDL | 12 HLDL |
4 | D+15 | 766±30HLD+15 544±40HLD+15 | ±12 HLD+15 | 12 HLD+15 |
5 | G | 590±40HLG 500±40HLG | ±12 HLG | 12 HLG |
6 | E | 725±30HLE 508±40HLE | ±12 HLE | 12 HLE |
7 | C | 822±30HLC 590±40HLC | ±12 HLC | 12 HLC |
· Measuring range:HLD(170-960)HLD
· Measuring direction:0°-360°
· Hardness Scale:HL、HB、HRB、HRC、HRA、HV、HS
· Display:segment LCD
· Data memory:500 groups max.(relative to impact times 32-1)
· Printing paper: width is (57.5±0.5)mm, diameter is 30mm.
· Battery pack: 6V NI-MH
· Battery charger: 9V/500mA
· Continuous working period:about 150 hours(With backlight off, no printing)
· Communication interface:USB2.0
· Outline dimensions:212mm×80mm×32mm
Configuration
| No. | Item | Quantity | Remarks |
Standard Configuration | 1 | DGT-HT580 Main unit | 1 |
|
2 | D type impact device | 1 | With cable |
3 | Standard test block | 1 |
|
4 | Cleaning brush (I) | 1 |
|
5 | Small support ring | 1 |
|
6 | Battery Charger | 1 |
|
7 | Paper for printing | 1 |
|
8 | Manual | 1 |
|
9 | Instrument package case | 1 |
|
10 | DataPro software | 1 |
|
11 | Communication cable | 1 |
|
12 | Calibration Certificate | 1 |
|
Optional Configuration | 13 | Cleaning brush (II) | 1 | For G type impact device |
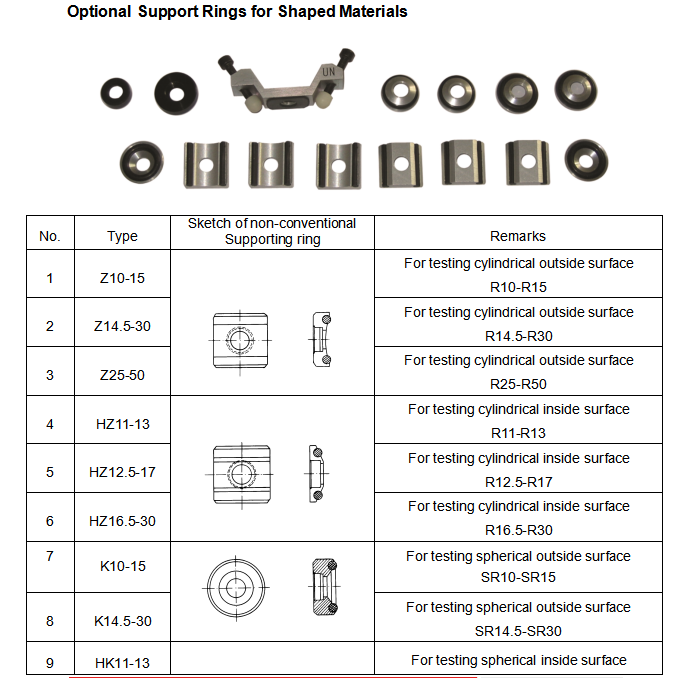
14 | Other type of impact devices and support rings |
|
|
